Creating Pet Patterns
If you’re looking to create your own pet pattern, this guide can help you get started! If you have any questions, please email Kendall at kkulper@gmail.com
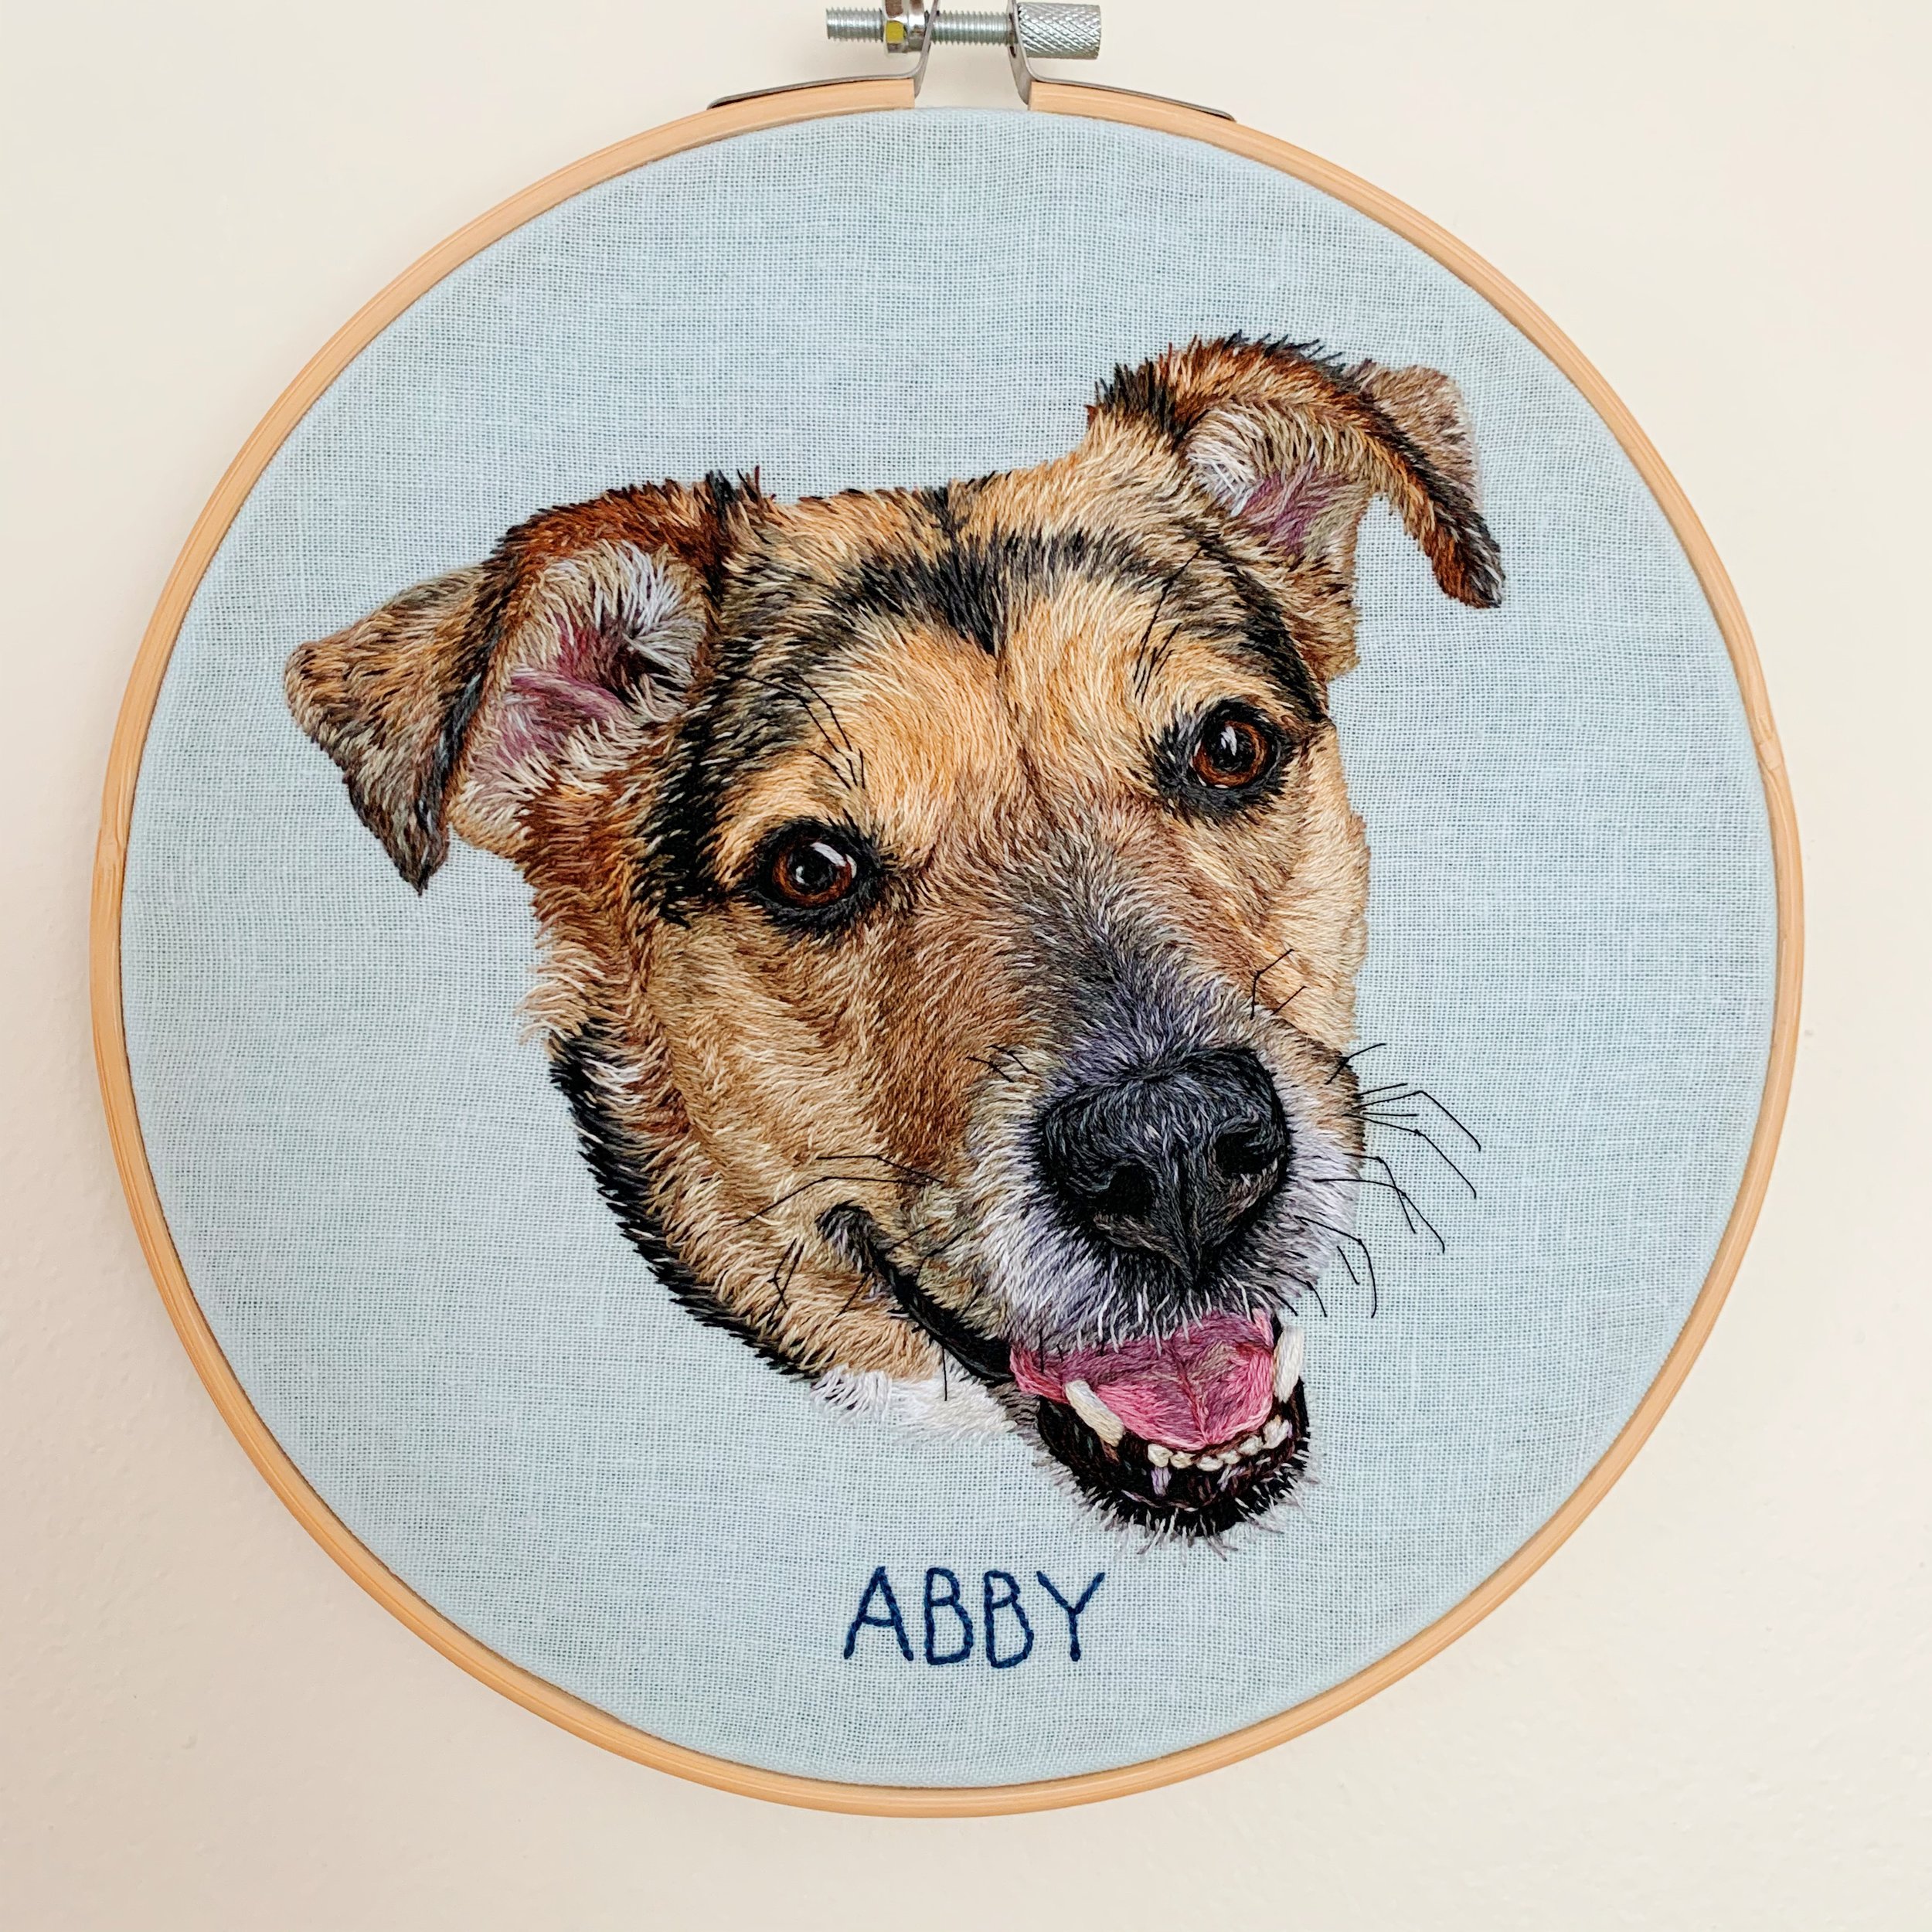
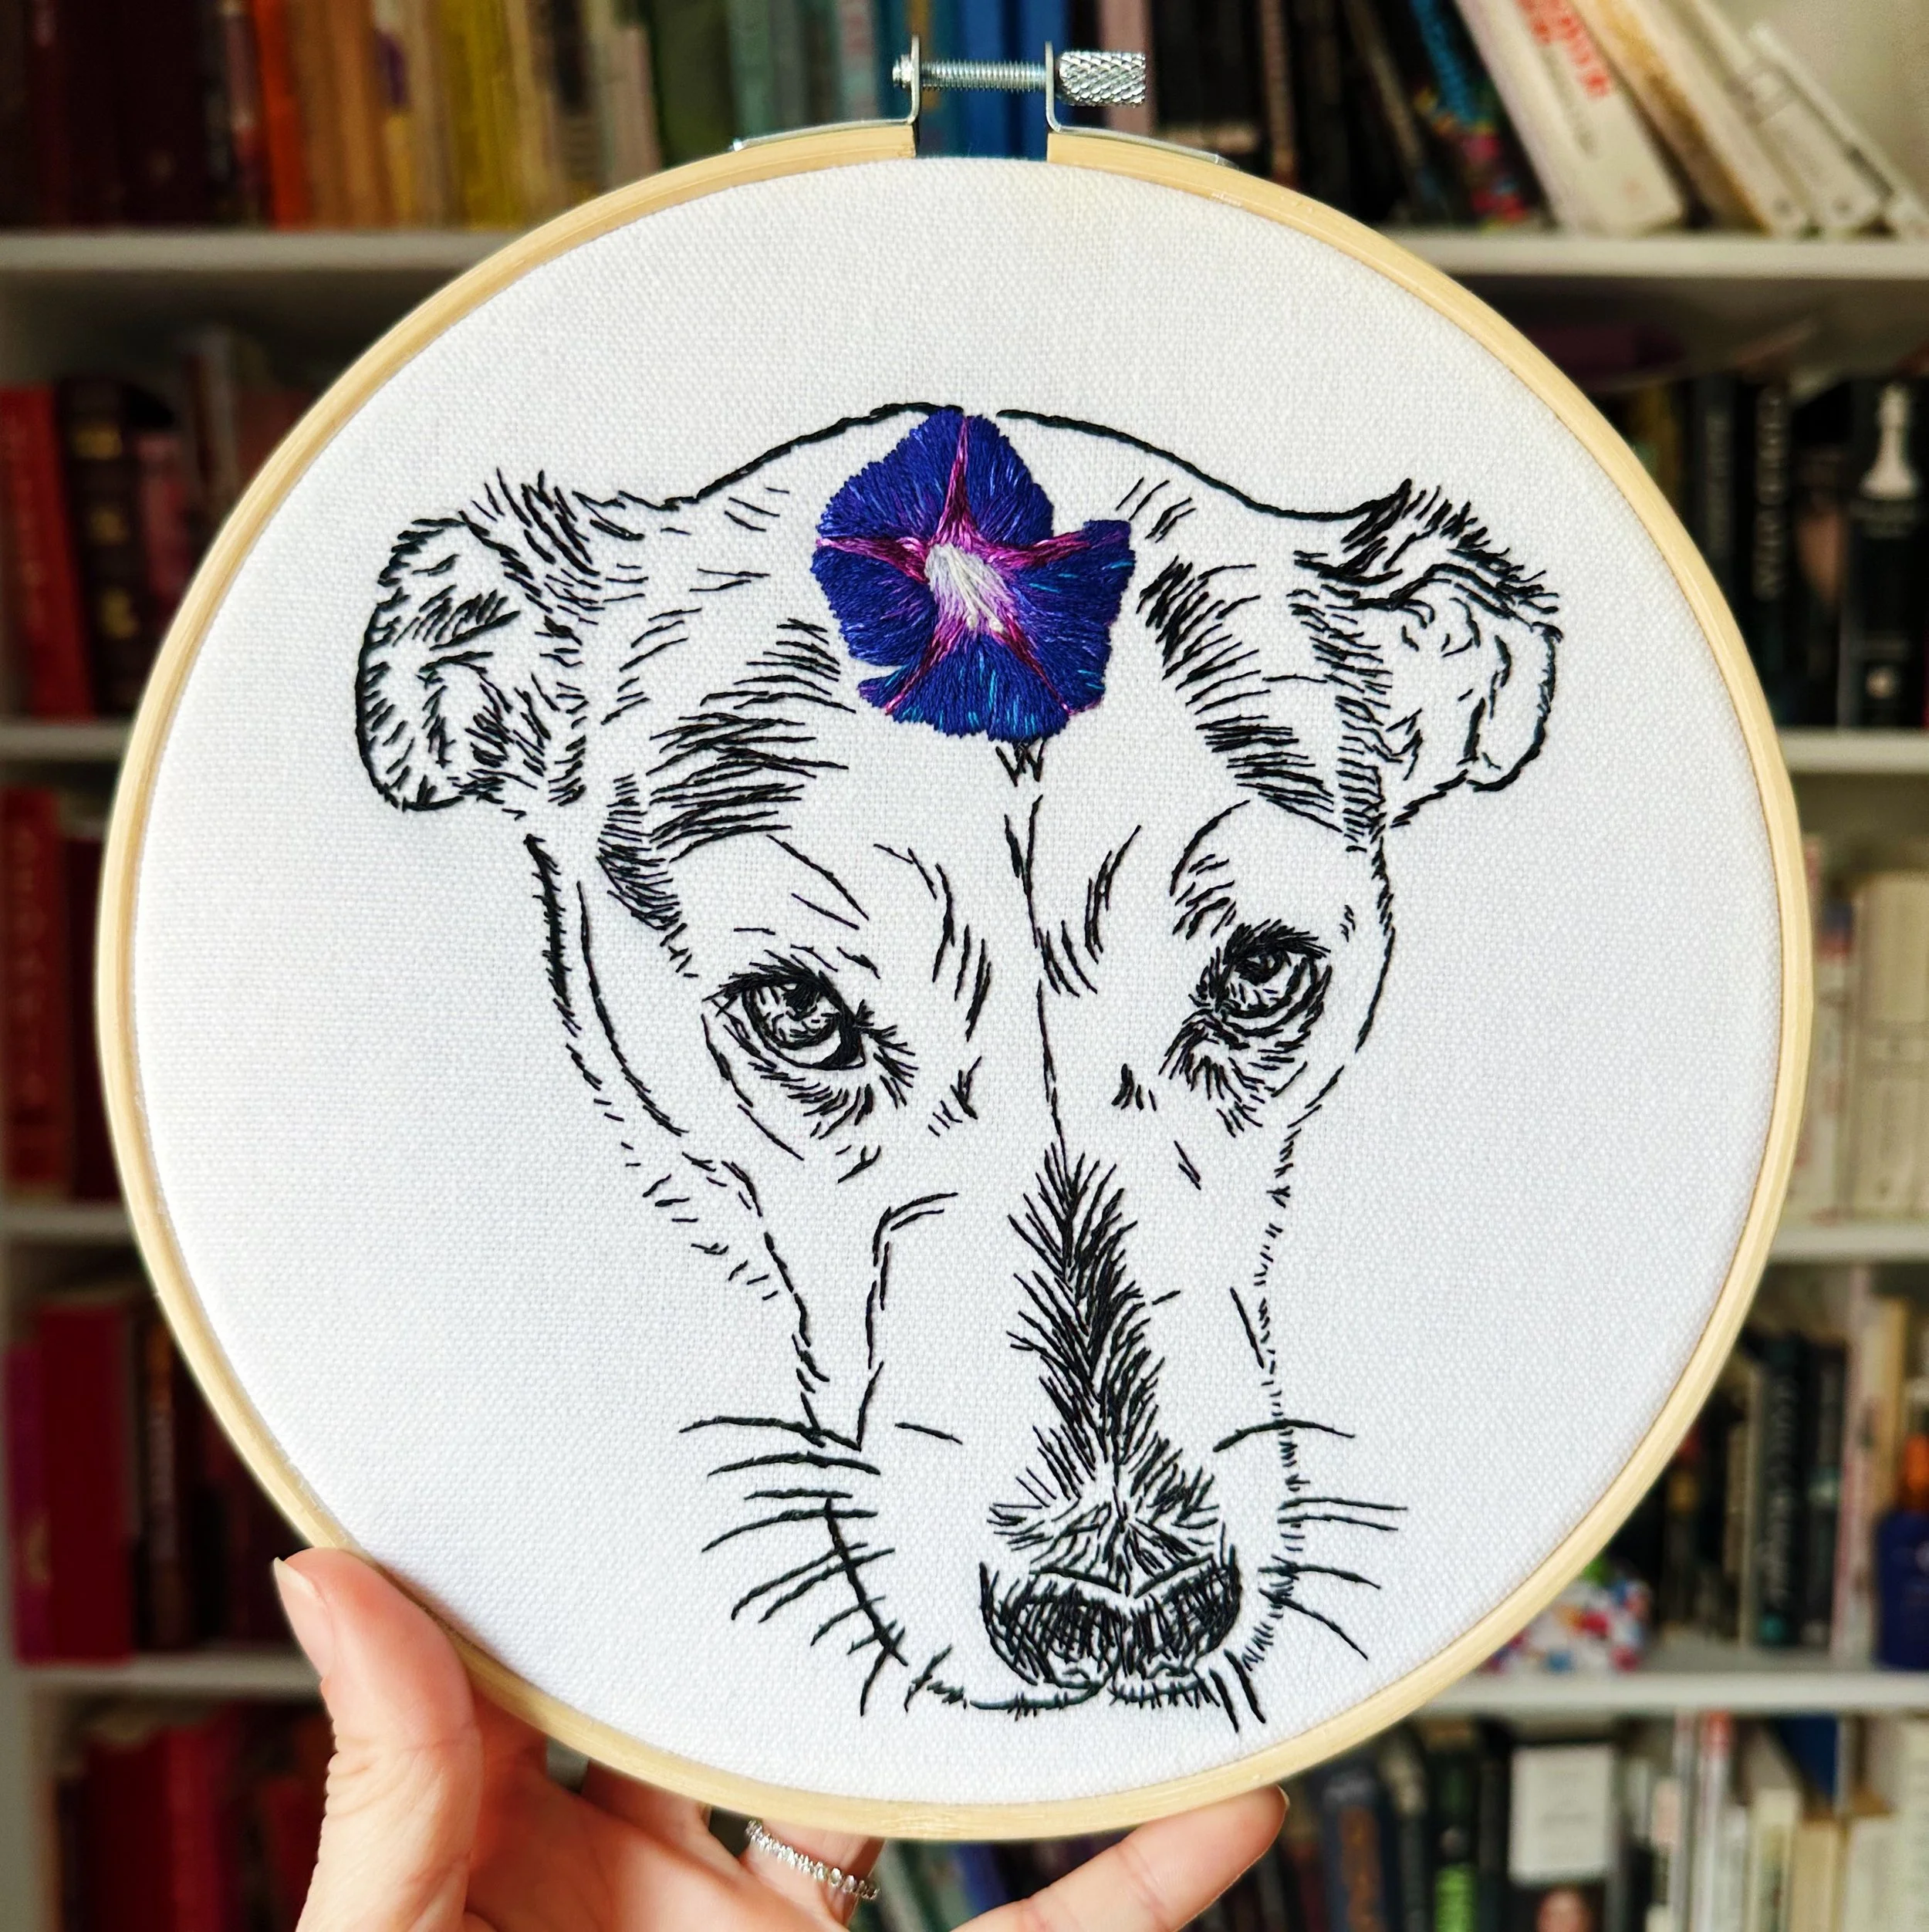
Pet Patterns - Color
Here’s how to turn your favorite photo of your pet into a pattern for a color portrait! If you’re interested in making a line portrait, please jump down to Pet Patterns - Black and White
1. Photo
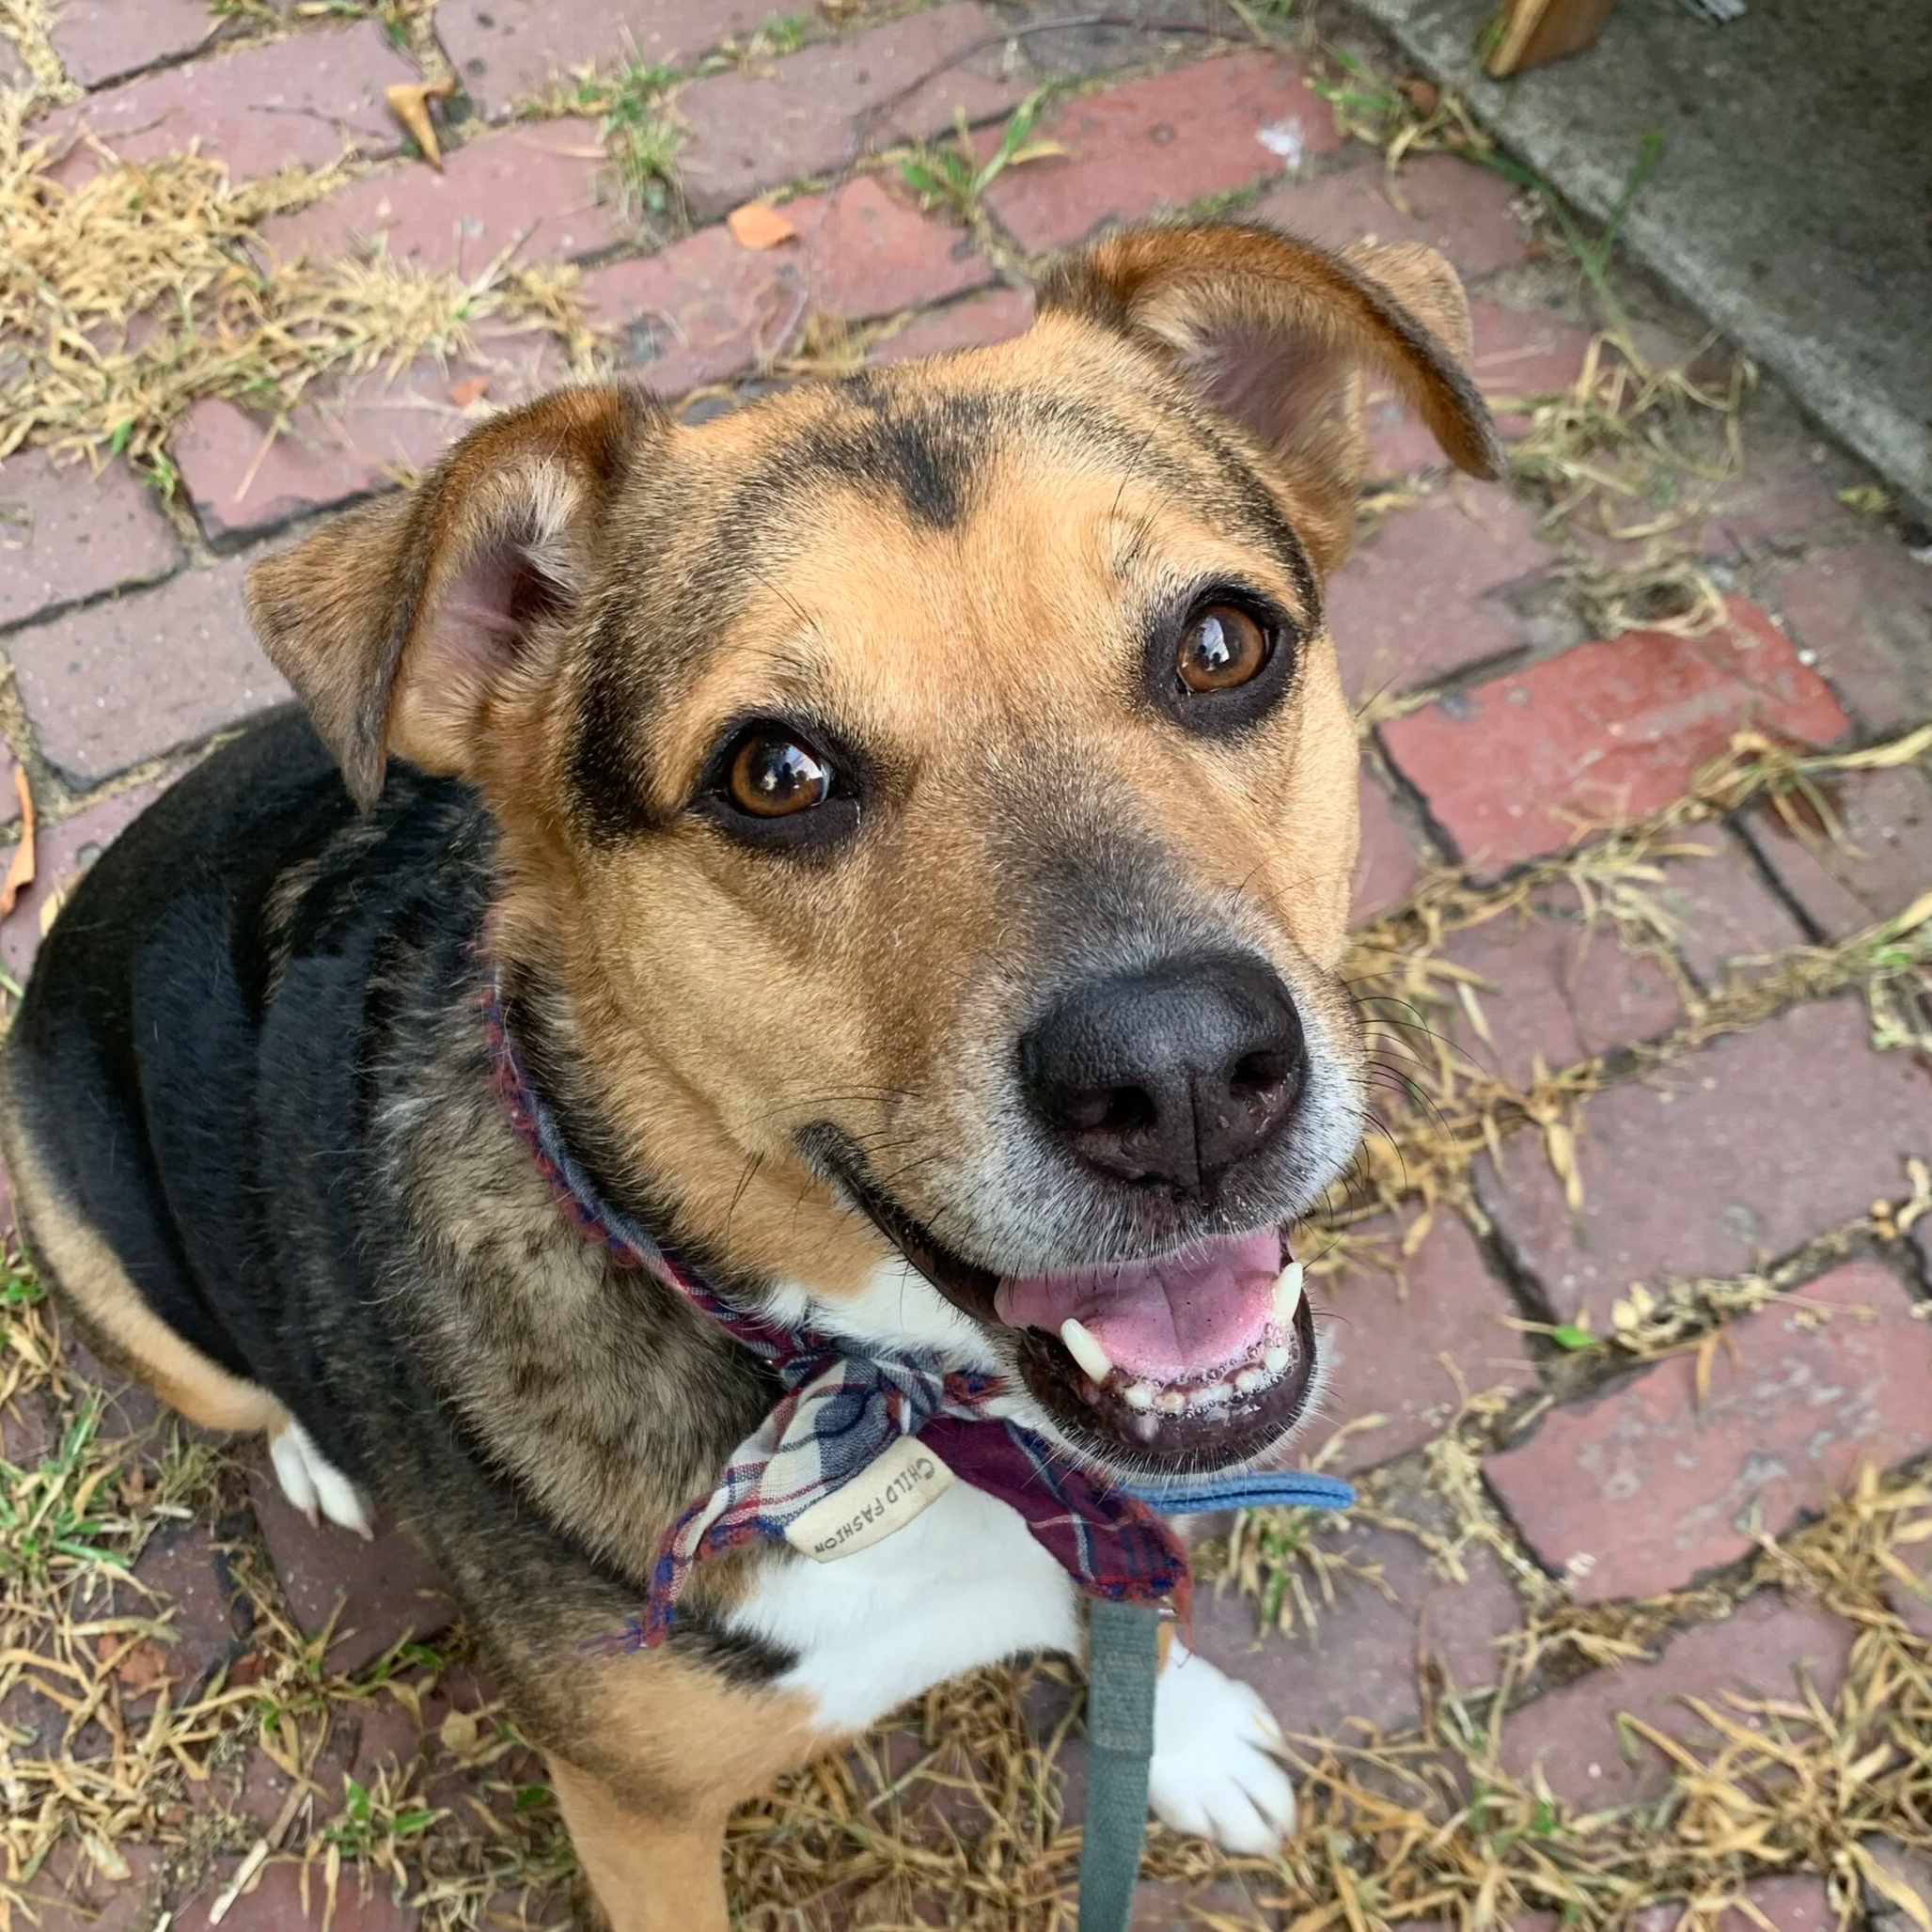
Start by picking out the right photo! You can check out my Pet Photography Guide for more detailed information about what kinds of photos work best. In general, you want a photo that is big, bright, taken in natural light, and shows your pet’s whole face.
2. Make a drawing
This step is optional, but I think it’s very helpful for really understanding what your pet looks like before you get started. Pay special attention to the fur pattern and direction, especially in tricky areas like around the eyes and the nose. You can make your drawing either by using a drawing app (like Procreate on an iPad) or just sketching with a piece of paper.
3. Designing your pattern
Think of your color pattern as a map for your embroidery. It doesn’t need to be very detailed, but it should help you translate your reference photo into embroidery. You want to start with the major features (eyes, ears, nose, mouth, and head shape), and then add in the fur shape and direction. Pay close attention to areas where the fur curves or changes direction, especially in the areas around the eyes and nose. Your pattern should show your pet’s bone structure, fur direction, and major features, but it doesn’t need to include very fine details (since you’ll be going over everything with your base layer first). If there are areas where your pet’s fur color changes, it can also be helpful to outline those shapes or areas.
There are several different methods you can use to design your pattern. Here are two I recommend:
The Printer and Trace Method (Watch a short video of this method here)
1. Open the photo you’d like to use in an image editing program (if you don’t already have one, you can download a free image editor here)
2. Crop the photo (in GIMP: Rectangle select tool, drag a box around your pet’s face, go to the Image drop down menu, and select Crop to Selection) and resize it to the size of your hoop (in GIMP: Image drop down menu, Scale Image. Change the drop down units—usually set as “px”—to inches, and resize to 6”. If your image isn’t a perfect square, make sure that the longest side is set to 6”)
3. Change your image to black and white (in GIMP: Colors drop down menu and select Saturation. Slide the Scale all the way to the left) and reduce the opacity to 60-70% (in GIMP: go to the layers window at the right of the screen, find the Opacity slider, and slide it to 60-70%).
4. Print your photo. Double check that photo has printed to the right size
5. Use the inner ring of your embroidery hoop to trace a circle around your photo with a pencil (so you don’t stain your hoop)
6. Use a Sharpie or heavy black marker to carefully trace over the details of your pet’s face. Pay close attention to placement of major features (eyes, ears, nose, mouth, and head shape) and fur direction, especially in tricky areas around the eyes and nose. It’s helpful to have your original photo nearby to reference as you trace over the photo
7. Prep your hoop with fabric, cut out your pattern, and tape it to the back side of your fabric
8. Use a bright light, lightbox, or bright window to trace your pattern onto your fabric with a heat-erasable pen
9. And stitch!
Using Procreate
1. Open a new canvas. I have a saved template I use for embroidery that’s 6”x6” with a DPI of 132
2. Open your photo (Wrench menu at top left, Add, Insert a Photo) and resize it so your pet’s face fills most of the canvas (Cursor menu, select Uniform, and slide the edges of the image to the size you want)
3. Open a new layer (Two overlapping squares menu at top right, click on the Plus sign)
4. Select the brush you’d like to trace with. The Technical Pen is a good option (Brush menu at top right, tap on Procreate Library, select Back to libraries, select Classic Library, select the Inking group, select the Technical Pen). Set the color to black (tap the colored circle at the top right and move the color selector to black) and the size of the brush to 60% (select the top slider all the way to the left of the image and move it to 60%)
5. Trace over the image. If you need to delete a stroke, you can use the Undo button (the counterclockwise arrow below the two sliders to the left), tap on your screen with three fingers, or use the eraser (the rectangle at the top right of the screen. Adjust the brush and size of the eraser the same way you changed your brush). Pay close attention to major features (eyes, ears, nose, mouth, and head shape) and fur direction, especially in tricky areas around the eyes and nose
6. Export the image to be printed, usually from a laptop or desktop (Wrench tool, Share, Share Image, JPEG, email to yourself)
7. Print the image, cut it out, and trace it onto your prepped hoop and fabric using a bright light, lightbox, or bright window and heat-erasable pen
8. And stitch!
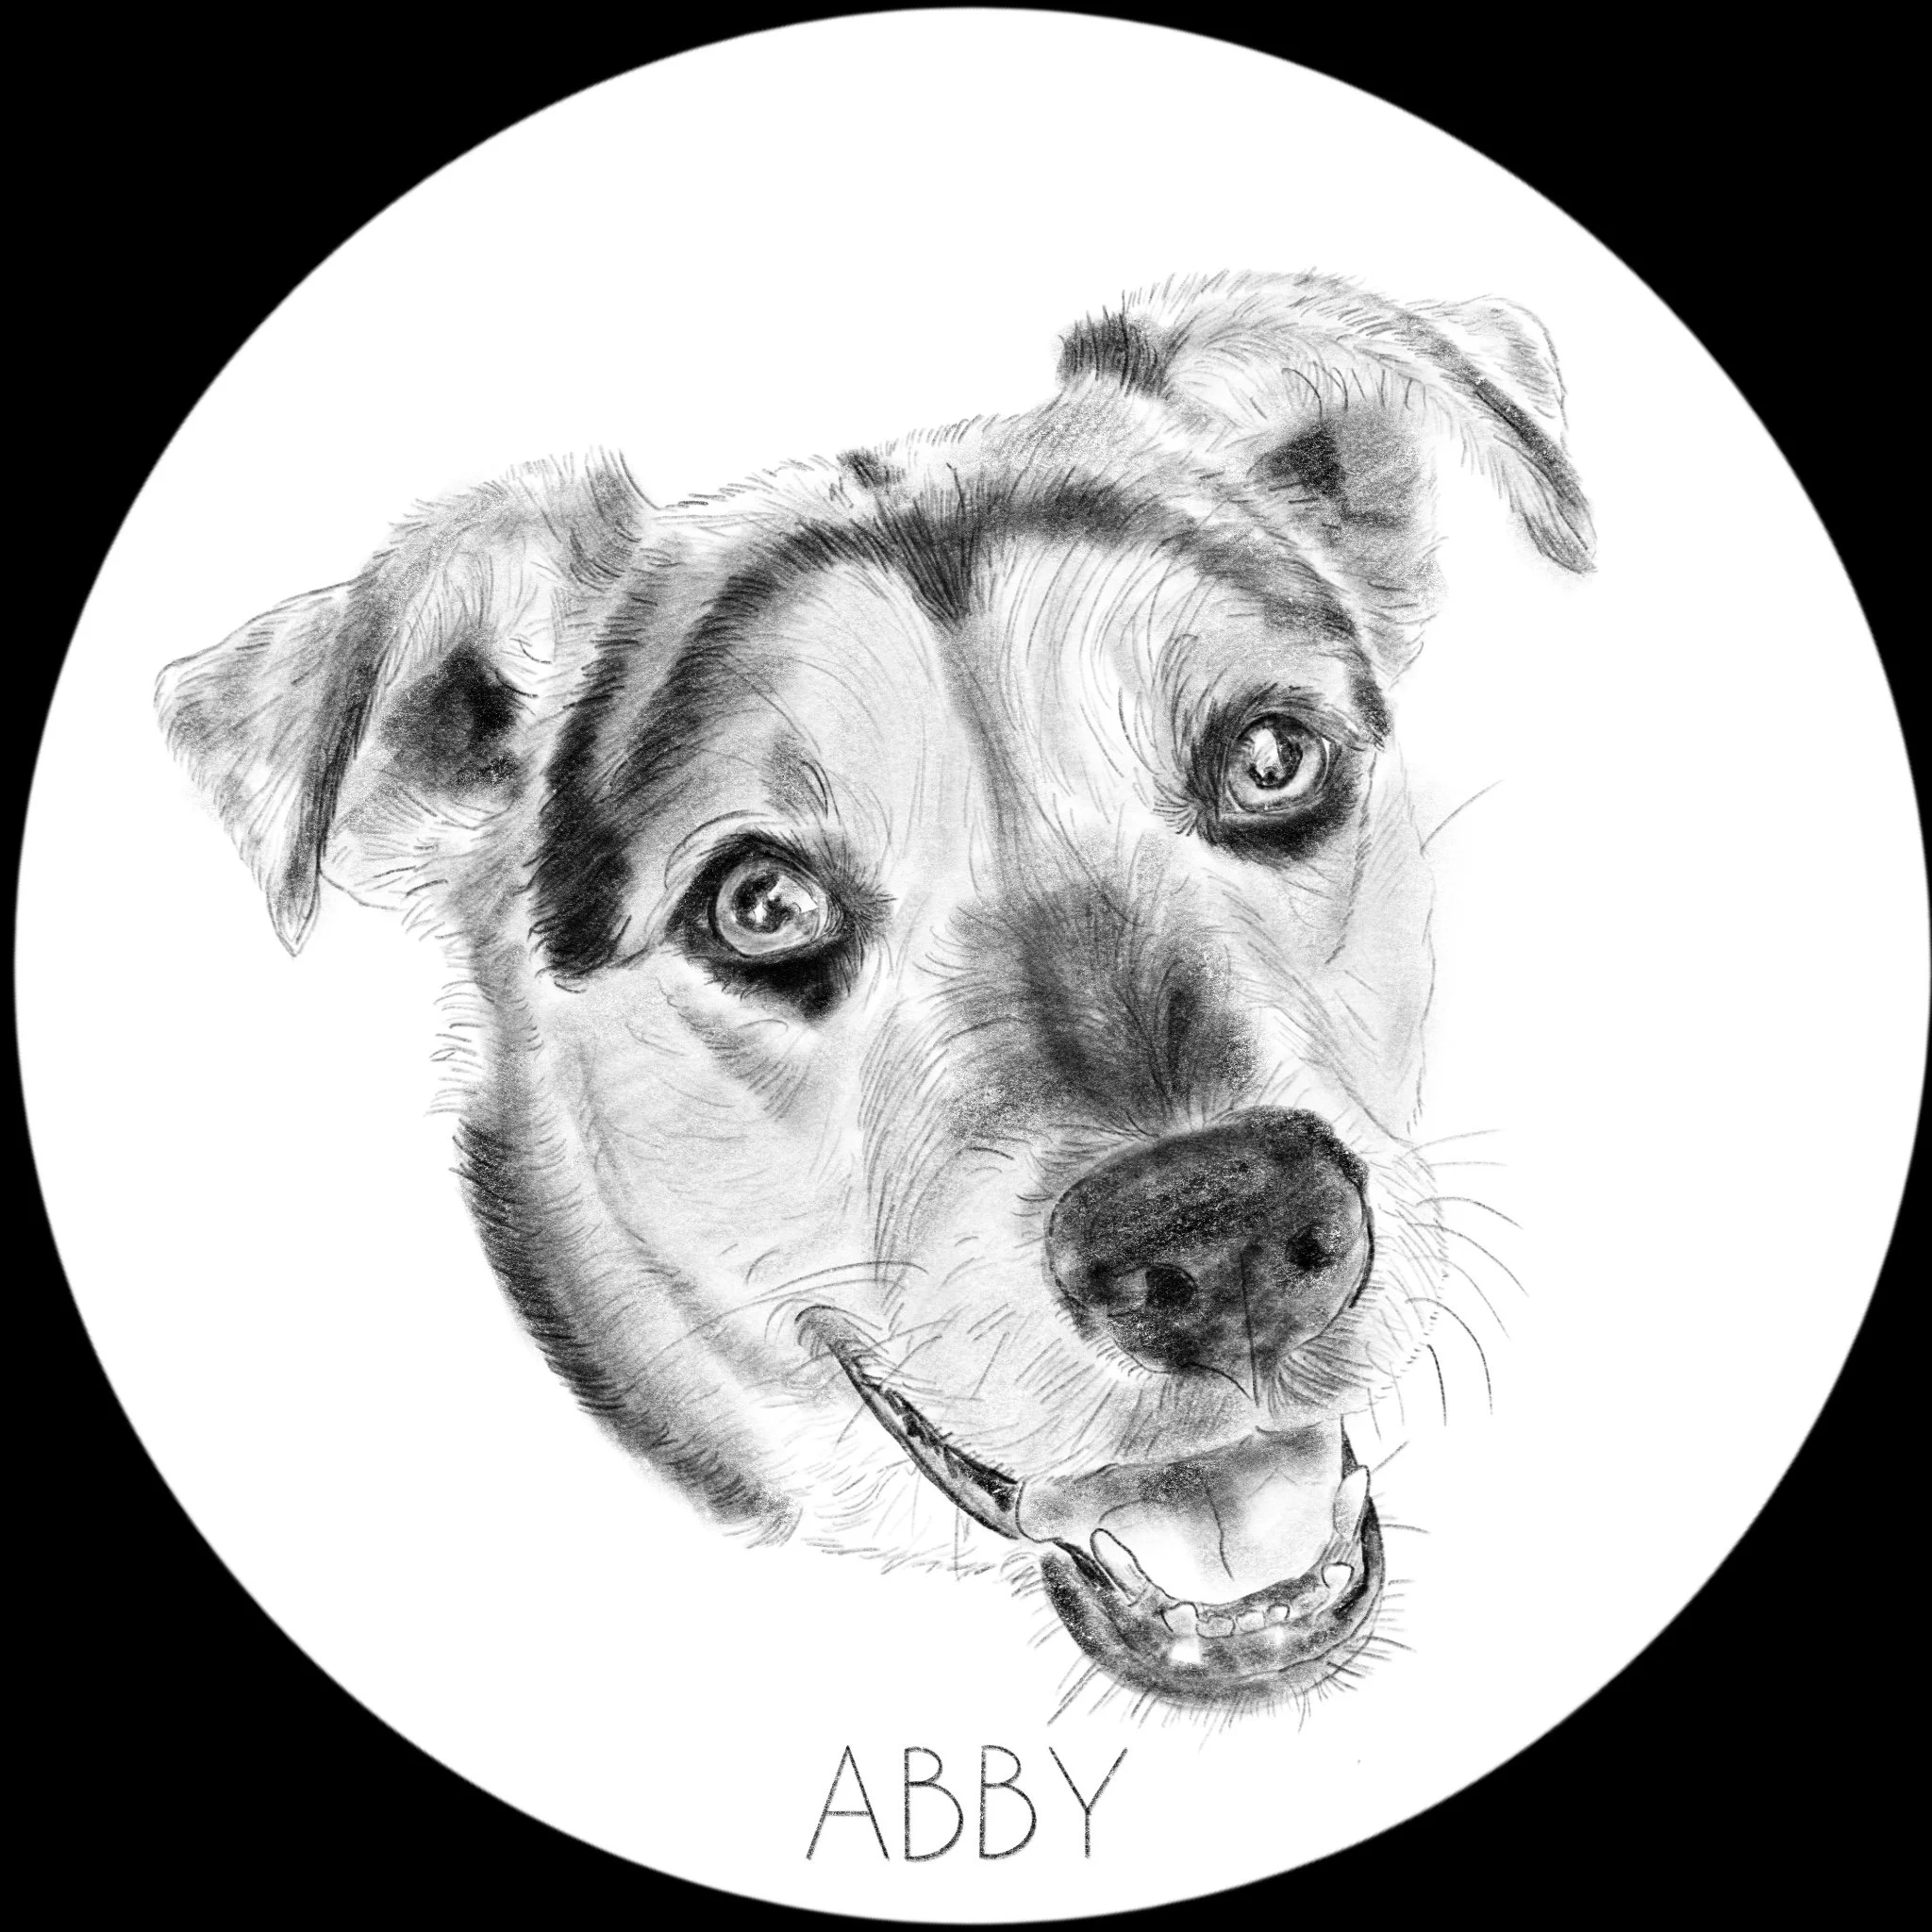
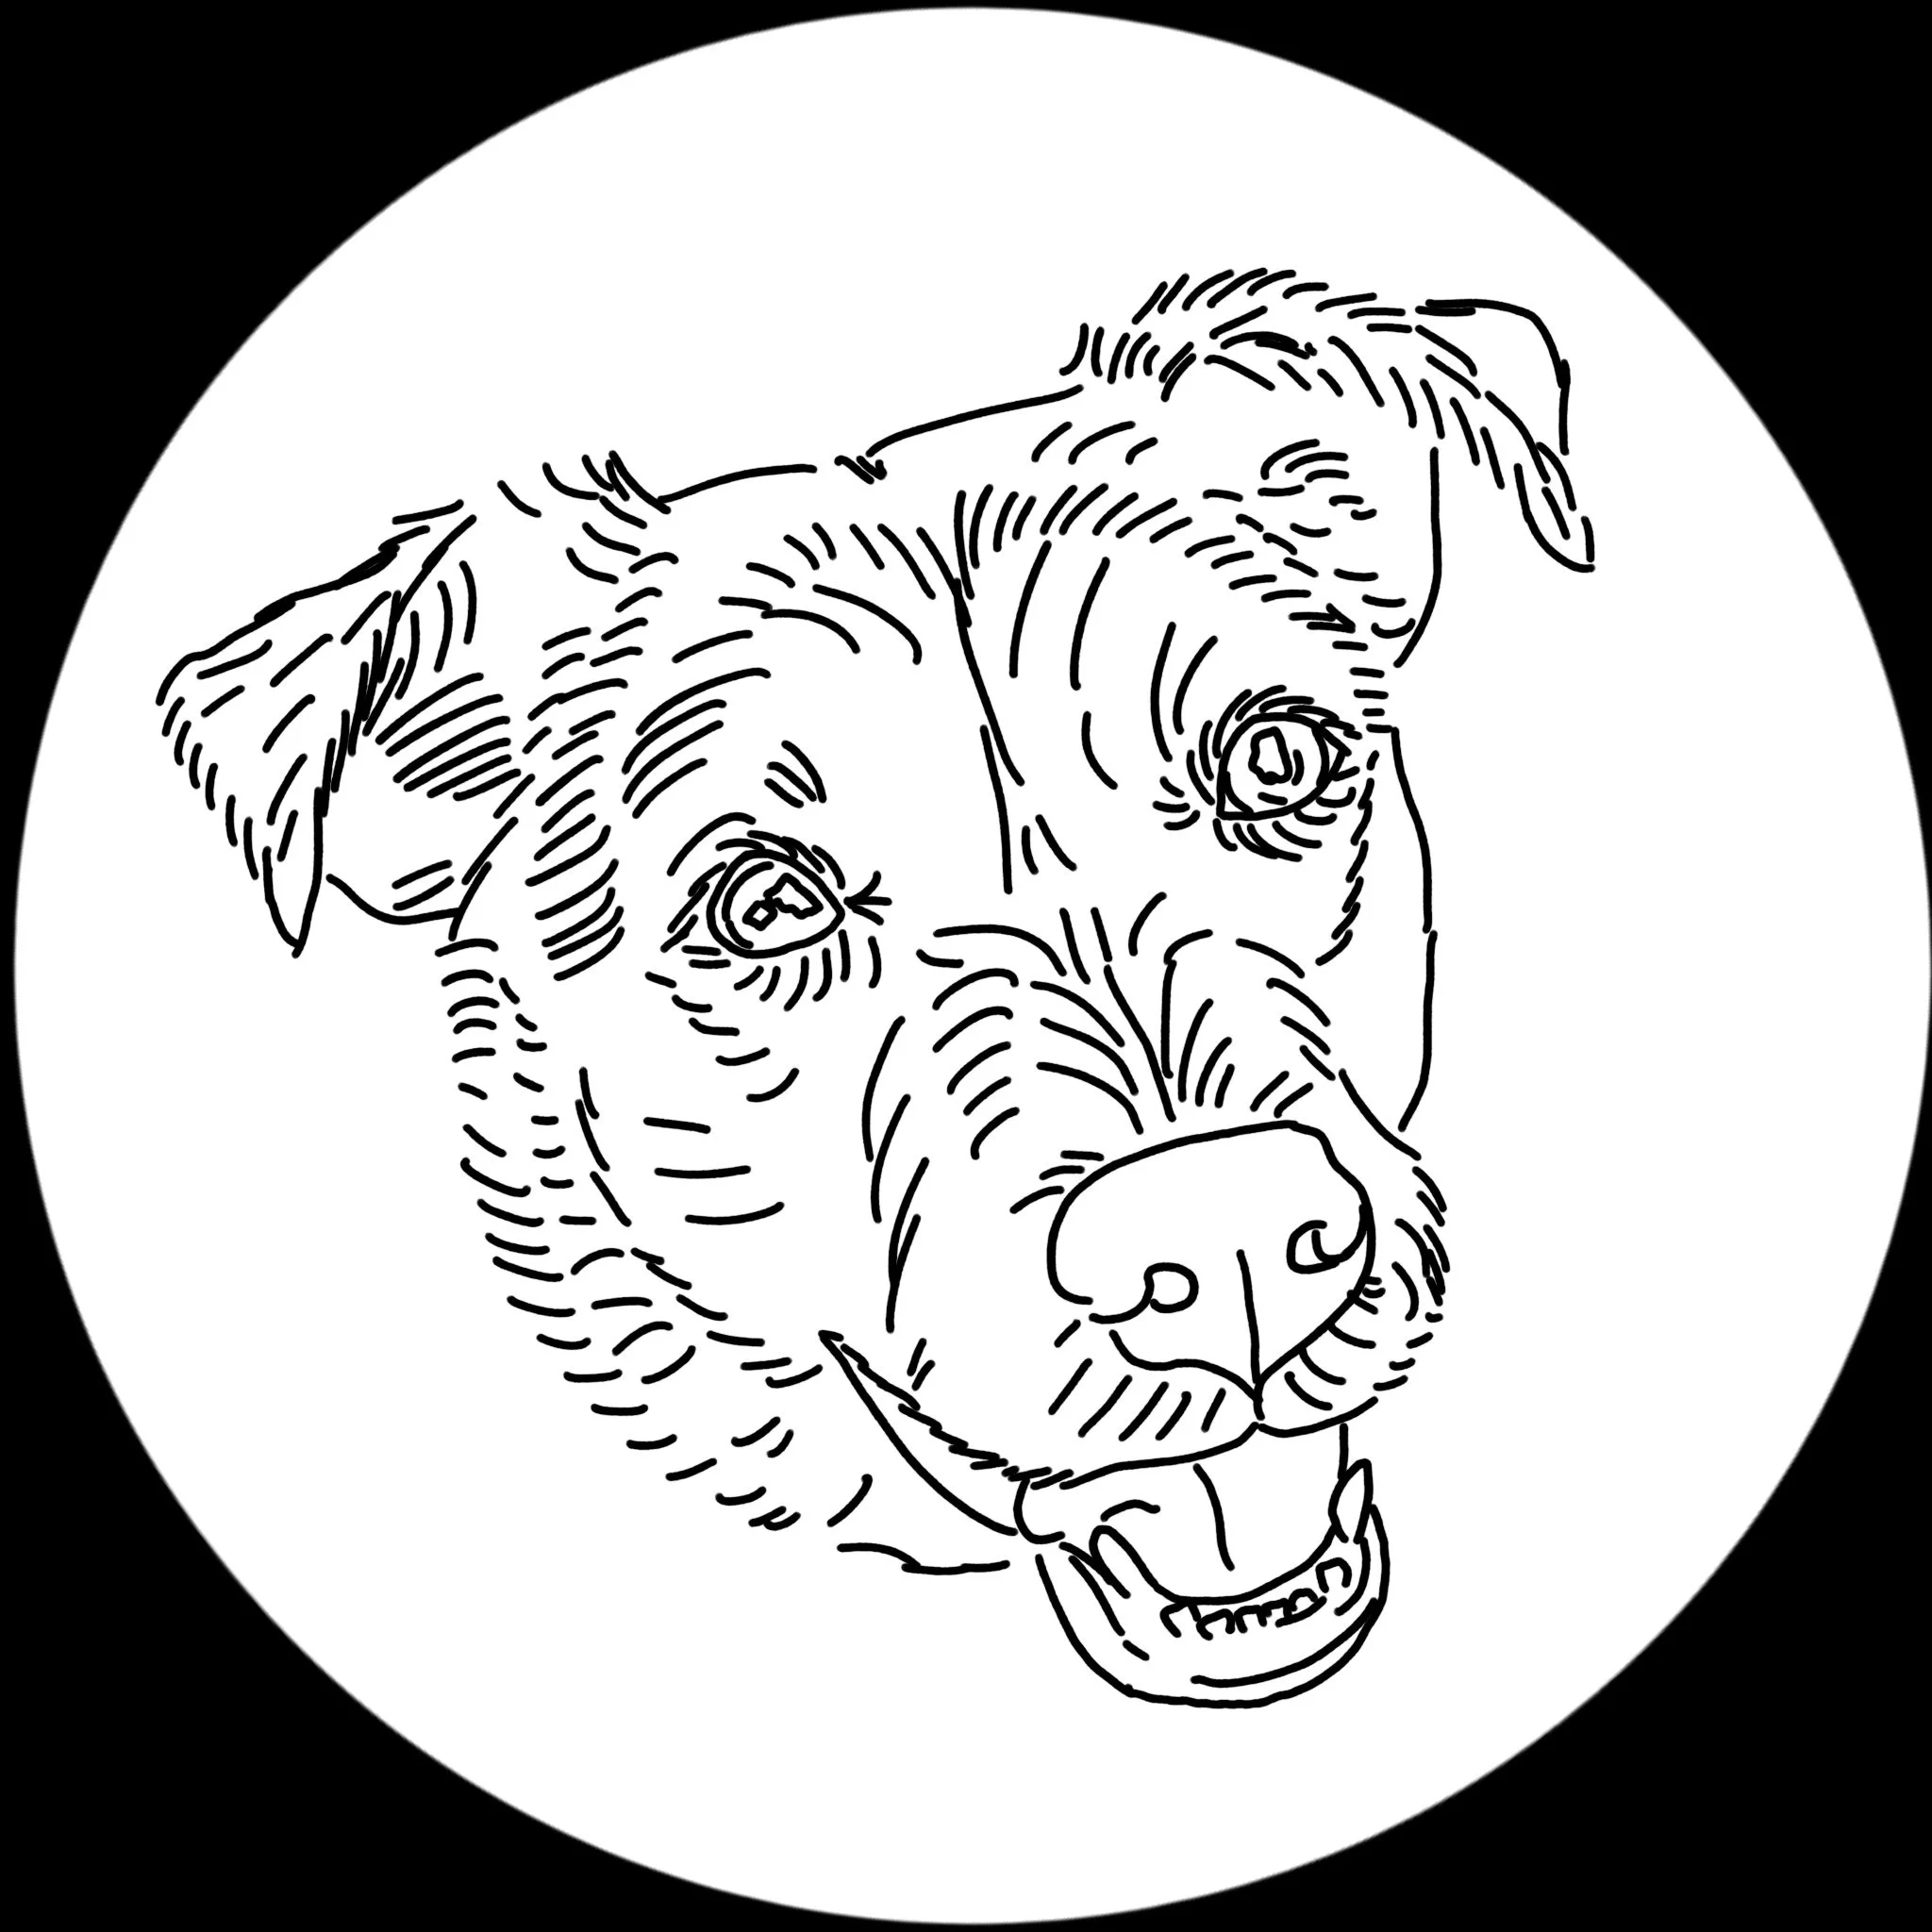
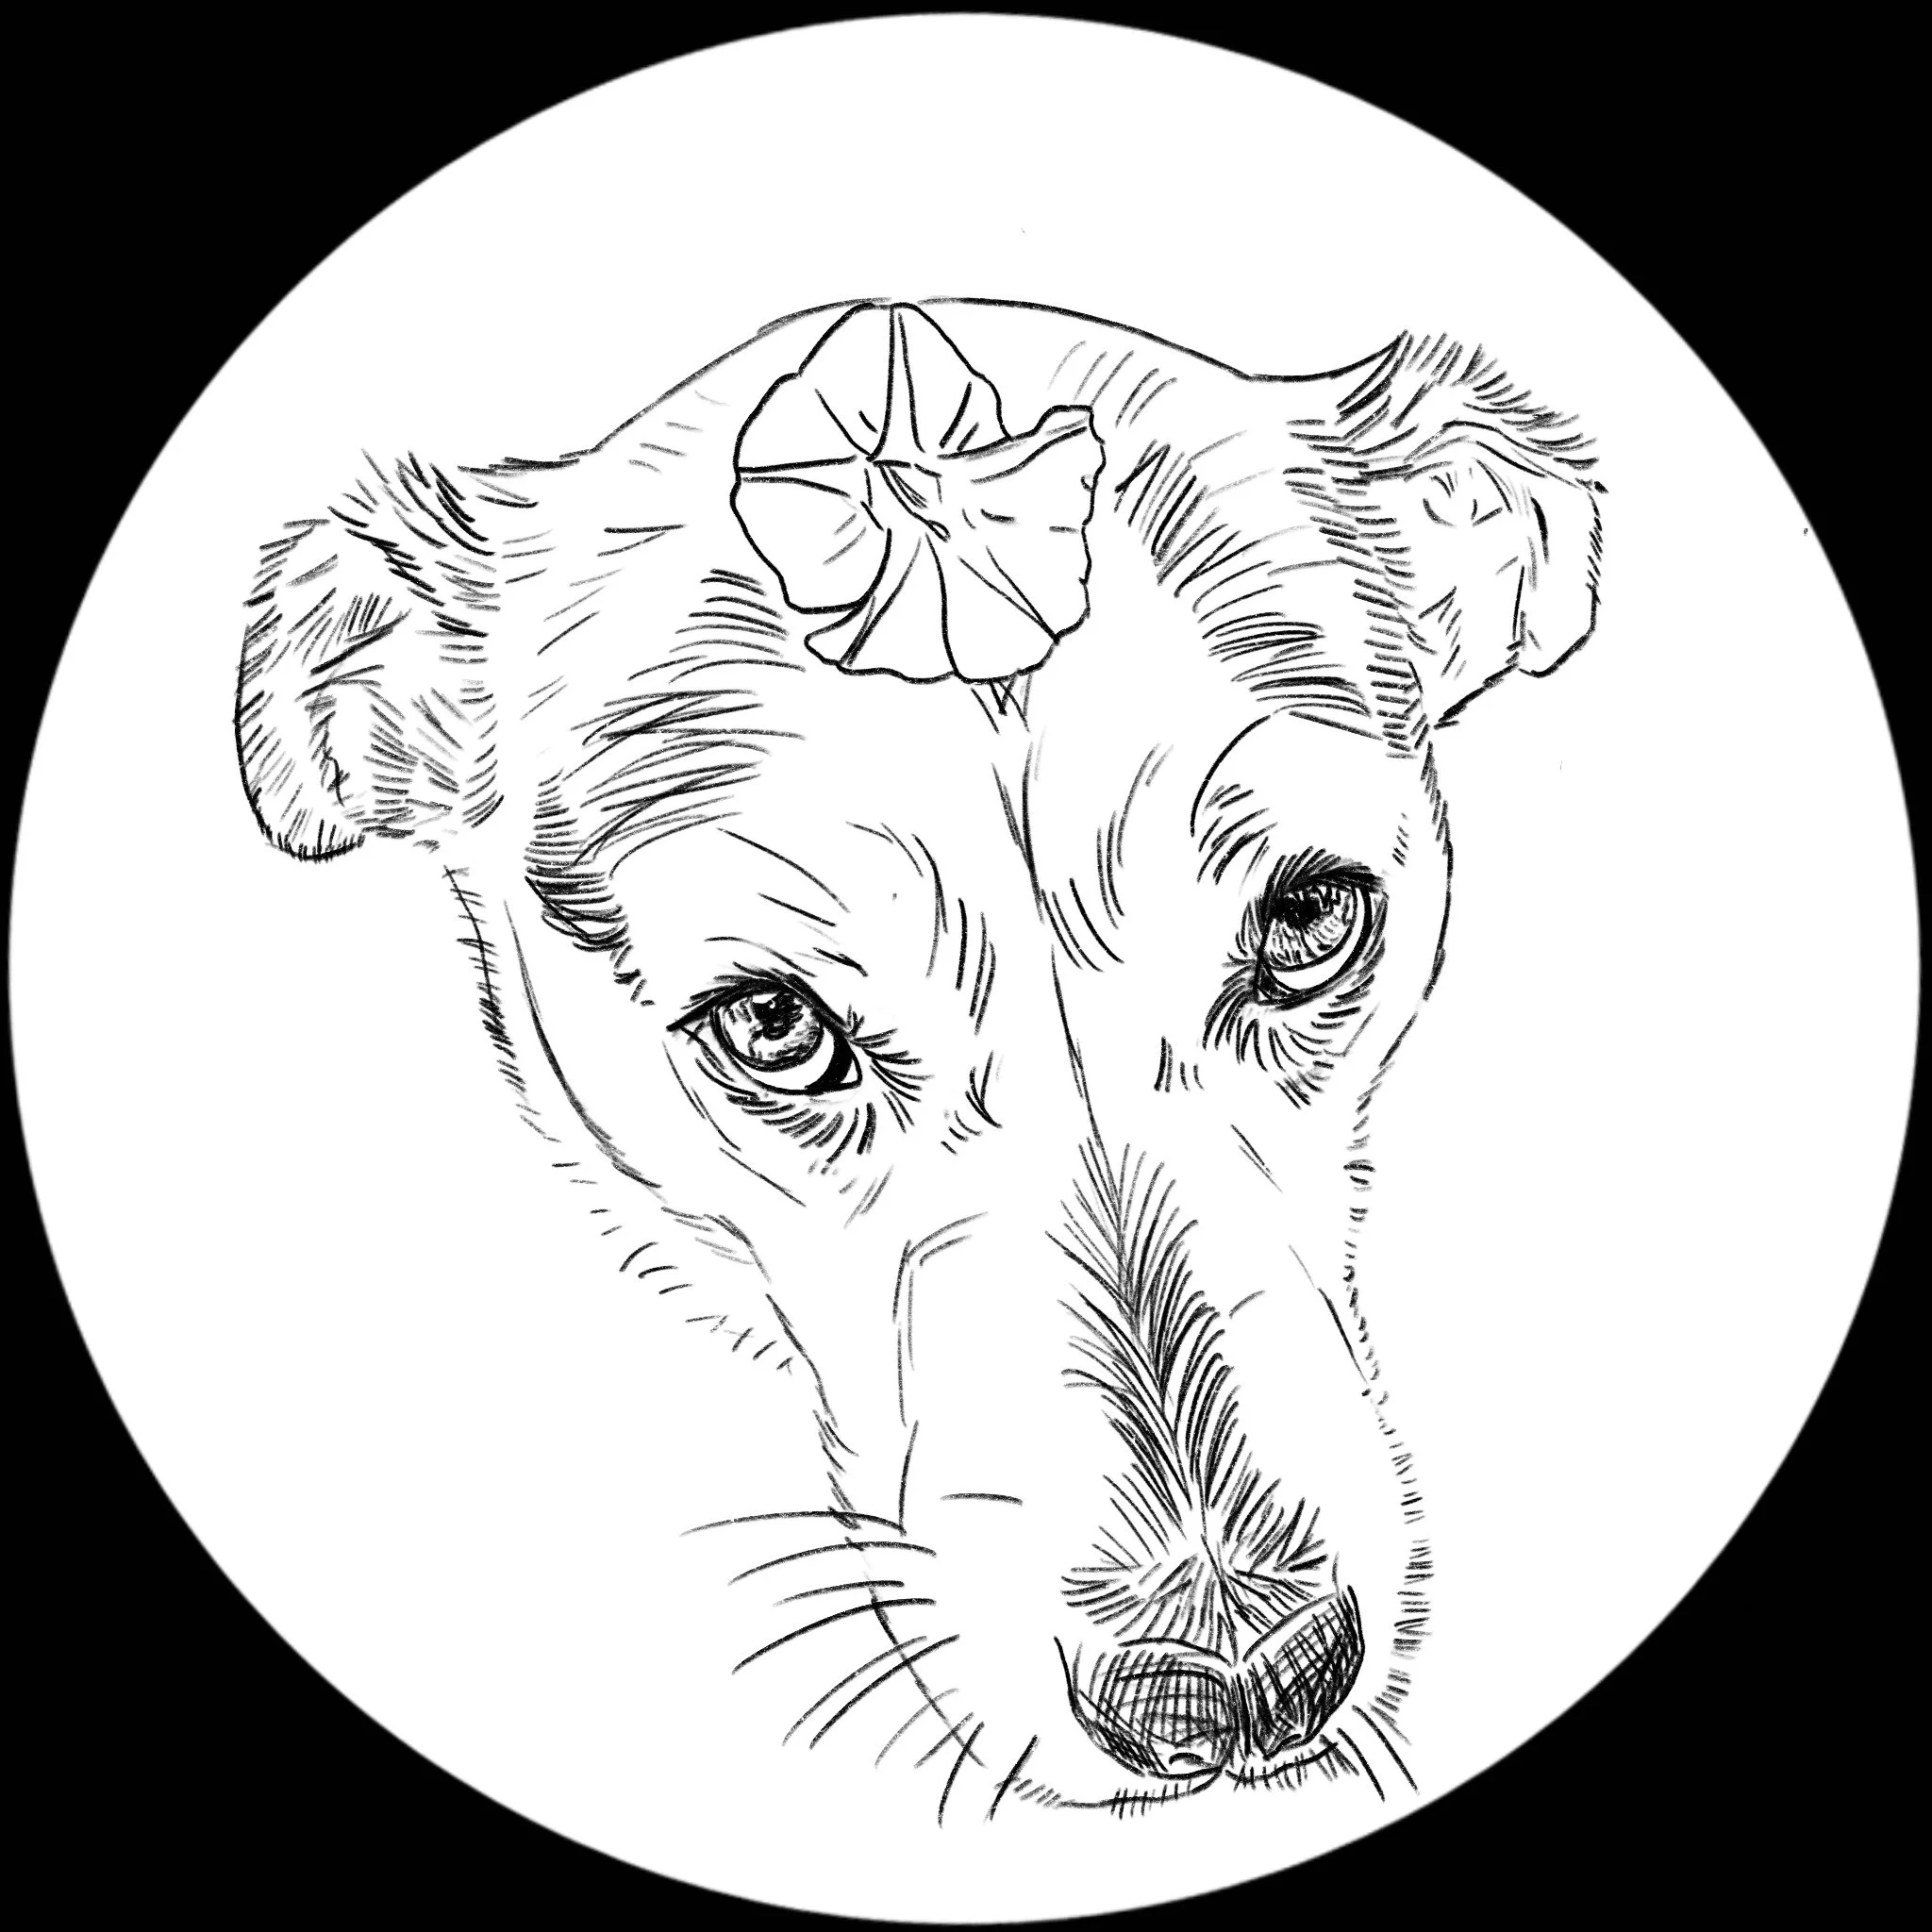
Pet Patterns - Black and White
Black and white patterns are a little trickier to design than color patterns, because you're essentially designing how your final piece will look. A black and white line piece will look like an embroidered drawing, because that’s exactly what it is: you’re embroidering a line drawing of your pet using just black thread. This means while your stitching will be a little easier, you’ll need to be very precise with your pattern. For this reason, I recommend printing your pattern onto water soluble pattern paper instead of tracing the pattern so you don’t lose any of the work you’ve put into designing your pattern.

1. Photo
Start by picking out the right photo! You can check out my Pet Photography Guide for more detailed information about what kinds of photos work best. In general, you want a photo that is big, bright, taken in natural light, and shows your pet’s whole face.
2. Designing your pattern
Because these pieces are essentially line drawings of your pet, you can make them as simple or complicated as you like. If this is your first time, you might want to start with a simple outline of your pet’s face and major features (eyes, ears, nose, mouth, whiskers), with a few lines for fur direction or face shape. Pay close attention to very dark areas (like the nose and inside of the mouth and ears) and make sure there’s a good contrast between lighter areas. For eyes, outline the reflections first, then go back with small marks to show the colors in the iris
I prefer using Procreate on my iPad to make these patterns, so I can really control how they look before I print them out, but if you don’t have access to Procreate, you can still design your own pattern using a printer and image editor
The Printer and Trace Method (Watch a short video of this method here)
1. Open the photo you’d like to use in an image editing program (if you don’t already have one, you can download a free image editor here)
2. Crop the photo (in GIMP: Rectangle select tool, drag a box around your pet’s face, go to the Image drop down menu, and select Crop to Selection) and resize it to the size of your hoop (in GIMP: Image drop down menu, Scale Image. Change the drop down units—usually set as “px”—to inches, and resize to 6”. If your image isn’t a perfect square, make sure that the longest side is set to 6”)
3. Change your image to black and white (in GIMP: Colors drop down menu and select Saturation. Slide the Scale all the way to the left) and reduce the opacity to 60-70% (in GIMP: go to the layers window at the right of the screen, find the Opacity slider, and slide it to 60-70%).
4. Print your photo. Double check that photo has printed to the right size
5. Use the inner ring of your embroidery hoop to trace a circle around your photo with a pencil (so you don’t stain your hoop)
6. Use a Sharpie or heavy black marker to carefully trace over the details of your pet’s face. Pay close attention to placement of major features (eyes, ears, nose, mouth, and head shape) and fur direction, especially in tricky areas around the eyes and nose. It’s helpful to have your original photo nearby to reference as you trace over the photo
Using Procreate
1. Open a new canvas. I have a saved template I use for embroidery that’s 6”x6” with a DPI of 132
2. Open your photo (Wrench menu at top left, Add, Insert a Photo) and resize it so your pet’s face fills most of the canvas (Cursor menu, select Uniform, and slide the edges of the image to the size you want)
3. Open a new layer (Two overlapping squares menu at top right, click on the Plus sign)
4. Select the brush you’d like to trace with. The Technical Pen is a good option (Brush menu at top right, tap on Procreate Library, select Back to libraries, select Classic Library, select the Inking group, select the Technical Pen). Set the color to black (tap the colored circle at the top right and move the color selector to black) and the size of the brush to 60% (select the top slider all the way to the left of the image and move it to 60%)
5. Trace over the image. If you need to delete a stroke, you can use the Undo button (the counterclockwise arrow below the two sliders to the left), tap on your screen with three fingers, or use the eraser (the rectangle at the top right of the screen. Adjust the brush and size of the eraser the same way you changed your brush). Pay close attention to major features (eyes, ears, nose, mouth, and head shape) and fur direction, especially in tricky areas around the eyes and nose
6. Export the image to be printed, usually from a laptop or desktop (Wrench tool, Share, Share Image, JPEG, email to yourself)
3. Transferring your pattern to your fabric
The easiest way to transfer your line pattern to your fabric for stitching is to print your pattern on water soluble pattern paper. But if you don’t have access to a printer, you can still get your pattern onto your fabric. Here are both those methods.
Tracing
1. Print your pattern (make sure it’s sized to your hoop!) and cut it out into a circle, or, if you’ve already traced your pattern over your printed photo, cut your paper into a circle.
2. Prep your hoop and fabric, and tape your pattern to the backside of your fabric
3. Using a heat-erasable pen, very carefully trace your pattern with a lightbox, bright light, or bright window. Go slow so you don’t lose any details!
4. And stitch!
Printing on Water Soluble Pattern Paper
1. Double check you have a laserjet printer (inkjet printers will stain your fabric when you wash out your pattern). If you don’t have a laserjet, you can usually find laserjet printers available at your local library
2. Load the water soluble paper into your printer. Double check that the fabric (not waxy side) is facing the right direction to be printed.
3. If you created your pattern in Procreate, export it to a laptop or desktop where you can print it (Wrench, Share, Share Image, JPEG, and email it to yourself). Double check the image is the right size. You might want to print a test page with regular printer paper so you don’t waste the pattern paper. If you traced your pattern over a photo, you can either scan your pattern or take a photo of it and send it to your computer to print. Double check the size is correct.
4. Print your pattern onto the pattern paper
5. Cut the pattern to the right size. Leave at least an inch margin around the pattern
6. Peel off the wax back and stick the pattern to your prepped fabric in your hoop. If you’re not happy with the placement, you can peel it off and restick it
7. And stitch!